Oregon Art Beat; #222; Dorothy Steele
- Transcript
All right. All right. Okay. Okay. Okay. Where's that key? Okay. Okay.
Okay. Okay. Okay.
Okay. Okay. Okay.
Okay. Okay.
Okay. Okay. Okay.
Okay. Okay. Okay.
Okay. Okay. Okay. Okay. Okay. Okay.
Okay. Okay. Okay.
Okay. Okay. Okay.
Okay. Okay. Okay.
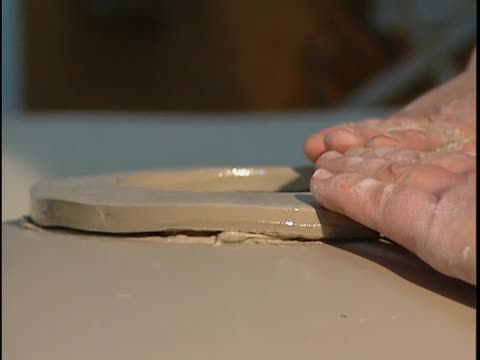
Okay. All right. So it's more less in the middle. Okay. So I just... This is basically it's slip and it's made from a powder form of this clay so it's compatible. And what this does is it helps bond the clay together so it doesn't come apart in the firing or think of it as clay glue or something. You have to really use it especially with porcelain. Because I have to say watching you it just looks
like so much fun. I just want to get in there and do it too. It is fun. Yeah. I really like working with slabs too. So I put the slip on both the piece itself and the foot. So to figure this out through trial and error I'm guessing. Well, it's a pretty standard method when you're adding in ceramics, when you're hand building. I took a lot of classes in college so this is kind of a basic technique. Now I noticed that the edges of the platter are not exactly round, not perfectly round. Is that okay by you? That's what I like. The reason
why I do that I could go perfectly round. But you might have noticed that when I was cutting it out how I intentionally just kind of let the probe flow. Because I like edges that I call it rhythm. Sort of like music. You can do perfect round but for me is in my own personal style I like that flow. Now this is called what kind of molding is this when you? This is a slump mold which I make these from large light fixtures. And I just use a regular casting platter. It's called pottery one. I get it from Georgie's. But you can just from a lot of different forms. You can make your own slump molds. So that's how I made this. And I like paddles. This bakery paddle. That just taps it in there so it'll stay. And it's called the slump mold obviously because.
You're slumping the clay over it as opposed to pressing the clay in it because you can also use press molds but that's the opposite. That's pressing in. This is sort of hanging over. And so that it'll keep it shape after it's dry. And you sponge it too. I like to make sure that everything is smooth and very finished looking and not having a lot of imperfections.
So that's what the smoothing does. And working with porcelain, it's a very smooth clay anyway so it's not too hard to do that. And what I'm doing with the probe right now is just finishing off that inside edge. Then I have this little trick that I do. I use a lot of people use these platters and I use them to hang. So I do a built -in hanger. This is just a wooden ceramic tool and I take it and I make a groove. Probably about an eighth to a quarter inch deep inside this foot so that when you put a wire around it it can't come out. So that it's a built -in hanger. Glazed sometimes gets in there when you glaze it and it will fill up a little bit.
And how heavy will that be so it's got to be? Yeah, it's heavy so you've got to use some strong. I use strong picture wire at least. There's the regular 15 pound picture wire. And there we have it. Now we just let it dry. For how long? Well, if my studio is nice and warm or it's a warm day, it only takes a few days to dry. There's one piece over there drying which I did yesterday. And kind of depends on the conditions in the studio and everything. But I would say at least three days before you can take it off of this. Like that one really is not ready to take off yet. I just did it yesterday but it might be tomorrow. And that's all there is to this.
So do you want to take that and put it on the... Yeah. Okay. Okay. You rolling pin? I'll just do a small little kitty soap dish. That'd be great. So I really do see an awful lot of bakery accoutrements around here. Oh yeah. And you say your father was a baker? Yeah, my parents had... I grew up in a bakery. Essentially, my parents had a bakery business. And I think I was very influenced
because I sort of go that direction with my clay. I use a lot of cutters that are handmade for me. I use these cutters of my designs just like cookie cutters. And slabs always kind of remind me of cookie dough. So there's a lot of bakery background in this. So we're making a little cat soap dish. This is one of my designs. I do these drawings, do the design, work them out usually with a paper template first. And then after I get all the bugs worked out and I feel confident enough, then I go ahead and get a cutter made.
Because a cutter is so much easier to use than cutting them out with a template. And you get nice edges too. And I smooth the edges before I put it in. And this will be a soap dish. One that I've been doing the soap dishes for quite a while. And it's just a little deli dish. I use this as a press mold. Opposite of the slump mold goes inside. And I sort of feel like I'm putting them to bed. You know, like tucking them in. It almost looks too easy. Well, it isn't too hard. The main thing is to get... You do have to get the tilt of the head
right and the little arms right. Until... Once you get the design and get all the bugs ironed out and get it the way you want it, then you can produce them pretty quickly if you have a cutter and the method down. How many do you produce a year? Of the soap dishes? Oh my. Let's see. It is one of my best sellers. And I sell them all over the country in different galleries. So that's hard to estimate. A lot. Several hundred of this product. So then after you put it to bed like this, then you... We put it on the ware shells. You can see I've got some... Those are actually little dog spoon rest and there's some soap dishes there. And in their little press molds. And those are just plastic forms I
found and I cut them with a saw. So I do use a lot of found objects that I go, oh, this will work. Or I'll try this. And then if it works, then I get a lot of those found objects and use them as molds. Or I pour a plaster mold. So I will just set this aside then. These are where... So you continue to tell us what you're doing if you want? Yeah. Okay. Anyway, I just take the little soap dish and it's press mold and I put it on these ware shells. And we usually leave them here at least two to three days to dry. And then when they're dry enough, you can see this one. And this is a little... It's kind of hard to tell right now, but this is a dog spoon rest. This is going to be a little bass at town. And it's dry enough to take out. And then we finish off the edges, smooth it. If there are any little stretch cracks, we get rid of those and we smooth them down. And then we paint them. So we paint on green ware. I paint everything green and then I just get... Fire it. Start out doing slab work. I mean,
when did you decide that slab work was what you wanted to do as opposed to... I see you do have a wheel. I have a wheel. I throw some things. But when I was going to school in art and college, I went to Momath. It was then called Oregon College of Education. It's always been Oregon College of Education. But when I took ceramics, I really took to it as a handbuilder. And I think that kind of goes back to that bakery thing. I really related to the rolling pin. And the most attractive thing about handbuilding to me is working with shapes. As you can see with all the cutters, I really like working with all kinds of different shapes in my designs. And with handbuilding, you can do that. You're not confined to one type of shape or around. You have a lot of freedom. Normally, right now, I'm going to do a little cat card holder, which
is another one of my good popular items. And normally, what I would do is I wouldn't be rolling it this much. When you work on a slab roller, you can change the thickness with shams. And for this piece, I would make it really thin so I'd have to put in both shams. And that makes the clay thin. But I'm just rolling it out now trying to get it thinner. This is sort of the old fashioned way to do it. You can throw it like pizza dough. I like doing that. Very hands -on. Yeah. I like some of these old methods of throwing the clay and rolling it out. But for handbuilding, it's good to have the slab roller and just roll out a lot of slabs so that you can cut several. If you're doing card holders, you can cut several at one time. And it goes faster. But this is fun. This way. Okay, I think we're just about right. These are awfully thin because they twist and turn and bend.
And what is this step here that you're doing? This is called ribbing. And it serves two purposes. It kind of compresses the clay and sort of cuts down your cracking. But one of the main reasons why I do it is I like to have a smooth surface to paint on. And this is canvas. So the clay is very sensitive. It will pick up any texture that you put it on. So you'll have this canvas. And to paint on that, canvas texture is very difficult. And since my work is highly decorative, I like to keep it smooth. At least on one side. The side that I paint on. I use oil, WD -40 on my cutters. And what that does is it keeps them from sticking. I also have this little thing I invented. It's a rolling pin with duct tape. Another use for duct tape. Because when I was, this saves my
hands. And it gives it a nice cut as opposed to trying to do this all the time. And when I just had the wood, all the wood shavings came off in the clay. So then I got, oh, I know duct tape. So there you go. The mother of an invention here. Yep. It really works well. Yeah, you used WD -40 the way a baker would put it in flour. Exactly. Again, going back to that. So I do believe growing up in a bakery had something to do with this. But I also, one of the biggest attractions is just the shapes. I mean, it's a lot of fun working with all these different forms. And it's fun coming up with them. So now, once you have it cut out, again, you have to kind of, you have to go around and smooth it. The edge is a little bit. I turn it over and I smooth those little burrs off.
Because any imperfection is going to be fired right in, isn't it? Yes. And I like to have really smooth rounded edges. And I don't like smoothing my product after it's dry that much. It's just too much work. It's actually better to do it when it's soft than to try to go back later after it's greenware. And then try to smooth it down. It takes more time. So this will be a little kitty card holder. Or you can use this for, I use this little card holder for my reading glasses because I'm always losing them. Because I am a hand builder, I have looked around for all sorts of little things I could use for props to prop things up. And this is that installation pipe. You can get it at home
depot. And I just cut it to work for the back part of the kitty. This kitty is all stretching out. It's got a little back stretched out. Okay, hold it a minute, Danny. I think we're about out of tape. You
- Series
- Oregon Art Beat
- Episode Number
- #222
- Segment
- Dorothy Steele
- Producing Organization
- Oregon Public Broadcasting
- Contributing Organization
- Oregon Public Broadcasting (Portland, Oregon)
- AAPB ID
- cpb-aacip-463073dfd87
If you have more information about this item than what is given here, or if you have concerns about this record, we want to know! Contact us, indicating the AAPB ID (cpb-aacip-463073dfd87).
- Description
- Raw Footage Description
- B-roll interview with pottery maker Dorothy Steele 1
- Media type
- Moving Image
- Duration
- 00:31:04;07
- Credits
-
-
Copyright Holder: Oregon Public Broadcasting
Producing Organization: Oregon Public Broadcasting
- AAPB Contributor Holdings
-
Oregon Public Broadcasting (OPB)
Identifier: cpb-aacip-9383fcd8829 (Filename)
Format: Betacam: SP
Generation: Original
Duration: 00:30:00
If you have a copy of this asset and would like us to add it to our catalog, please contact us.
- Citations
- Chicago: “Oregon Art Beat; #222; Dorothy Steele,” Oregon Public Broadcasting, American Archive of Public Broadcasting (GBH and the Library of Congress), Boston, MA and Washington, DC, accessed April 5, 2026, http://americanarchive.org/catalog/cpb-aacip-463073dfd87.
- MLA: “Oregon Art Beat; #222; Dorothy Steele.” Oregon Public Broadcasting, American Archive of Public Broadcasting (GBH and the Library of Congress), Boston, MA and Washington, DC. Web. April 5, 2026. <http://americanarchive.org/catalog/cpb-aacip-463073dfd87>.
- APA: Oregon Art Beat; #222; Dorothy Steele. Boston, MA: Oregon Public Broadcasting, American Archive of Public Broadcasting (GBH and the Library of Congress), Boston, MA and Washington, DC. Retrieved from http://americanarchive.org/catalog/cpb-aacip-463073dfd87